Video Overview
A look at the process for installing Layouts, Atoms and simple Molecules.
Installation Steps
Select a Component
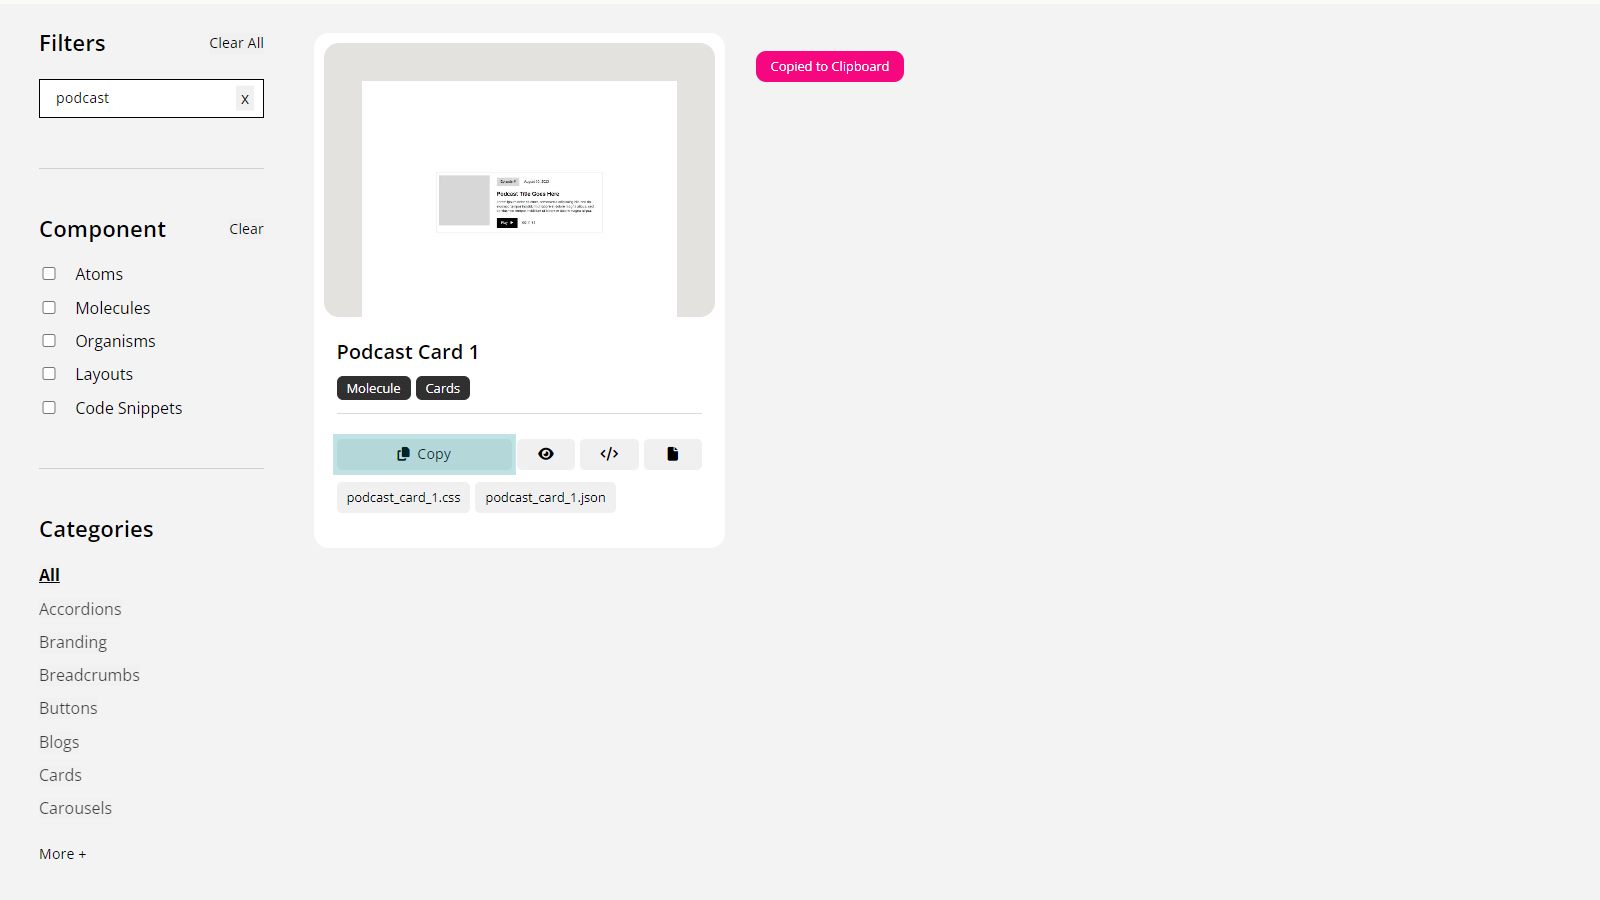
Use the Components Library to find a suitable element for your project. Each component tile has a series of options available allowing you to preview, view code, view instructions, download associated files & copy the HTML to your clipboard. The library has search, component type and category filters to help you locate the most appropriate element.
Learn more about the Component Library
Copy the HTML
From your chosen component tile you can copy the HTML to your clipboard by either using the ' Copy' button. Or you can open the installation instructions and use the button present in 'Copy the HTML to your project'.

Paste HTML to Project
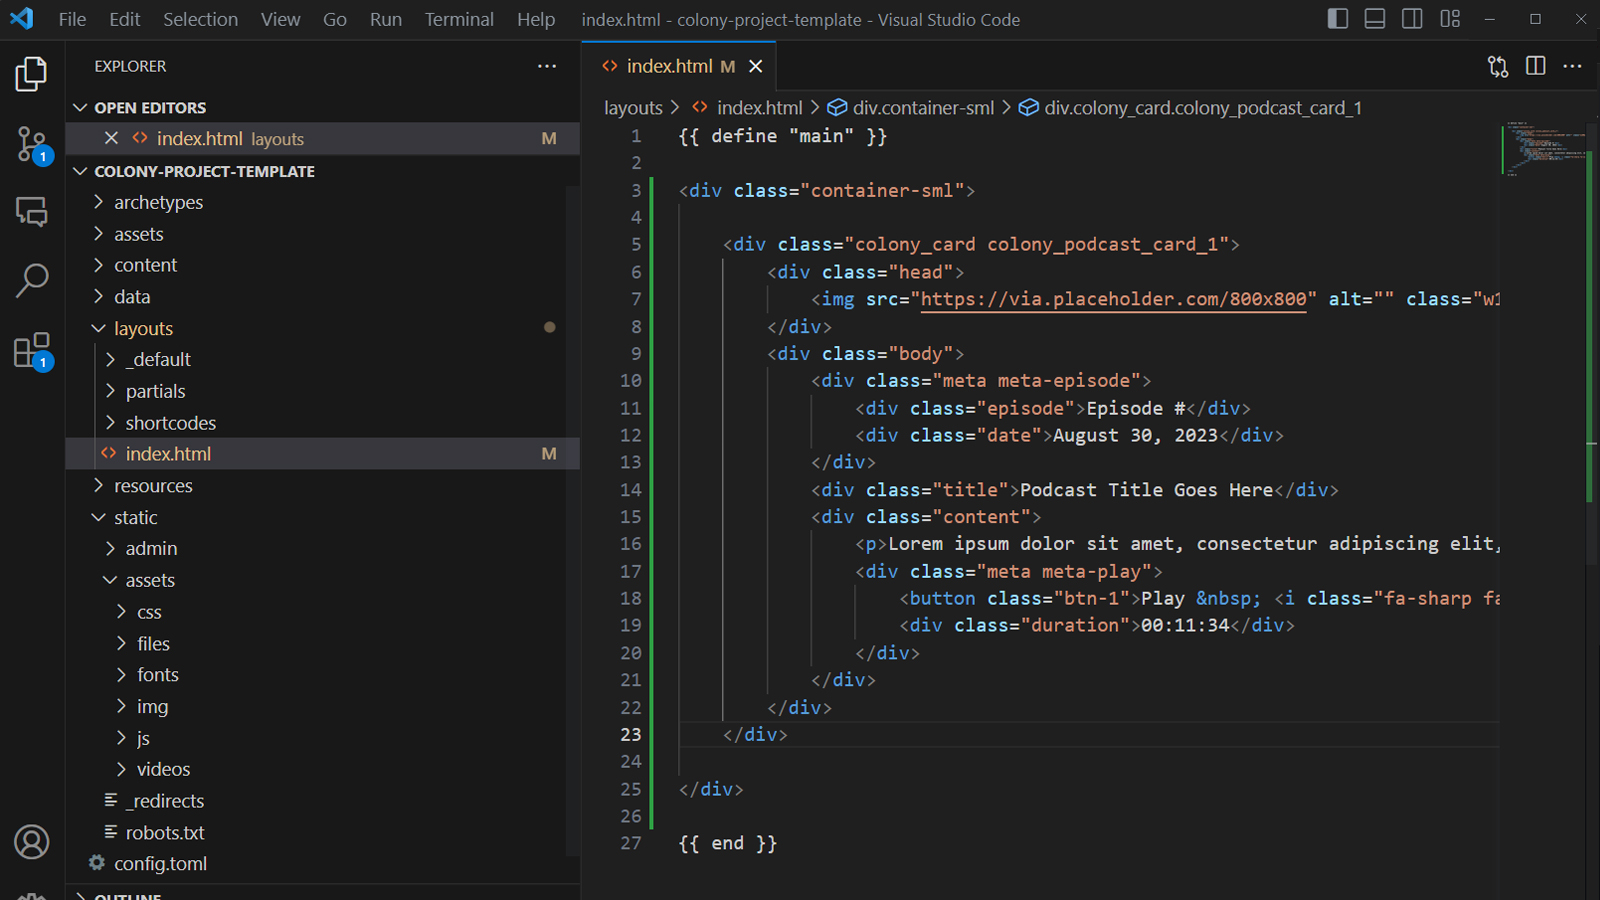
Navigate to your project and paste in the HTML in your desired location. Components can be added to any standard content page that supports HTML and can often be nested inside each other.

Add CSS to project
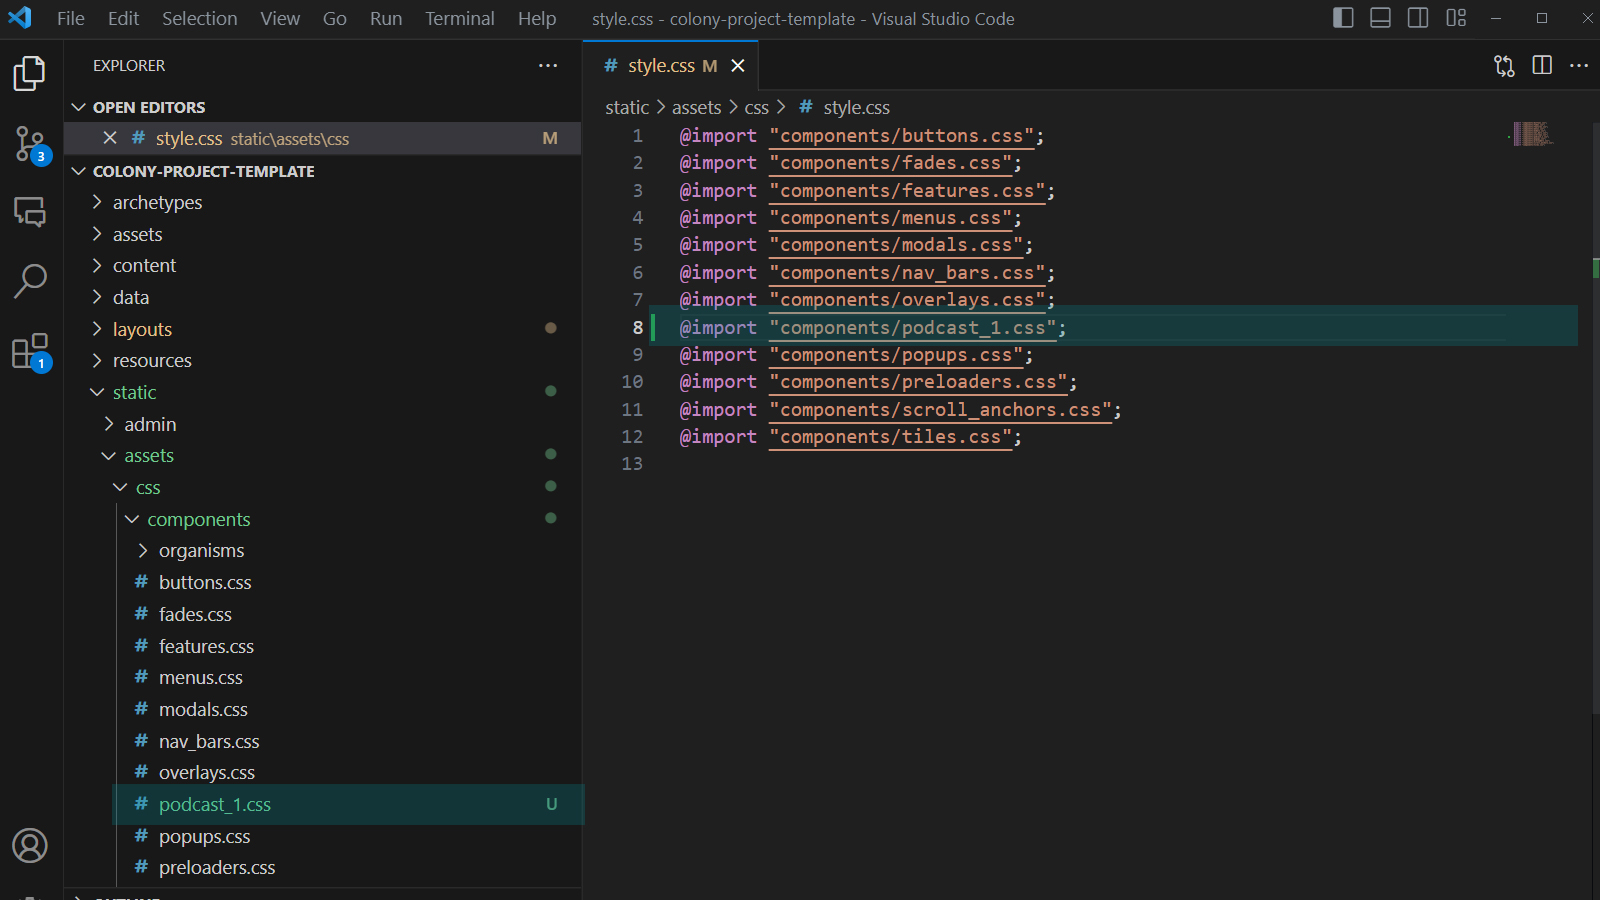
For some components you may need to add a CSS file to your project. If required this with be displayed under the action buttons on the component tile and should be added to static/assets/css/components. You will then need to copy the @import link from the installation instructions on the component tile & add to the top of style.css.

